
In the recent few years, Go has become one of the favourite options, when it comes to building lightweight, fast and scalable services. In this tutorial, I will be going through how to dockerize and deploy a Go service in the shortest time possible.
In this article we are going to use Heroku which is probably the most frictionless platform out there for deploying and hosting services and web apps, if you don't have yet an account at Heroku, please go on and create one, it's pretty straightforward and also free.
I. Heroku Project Creation.
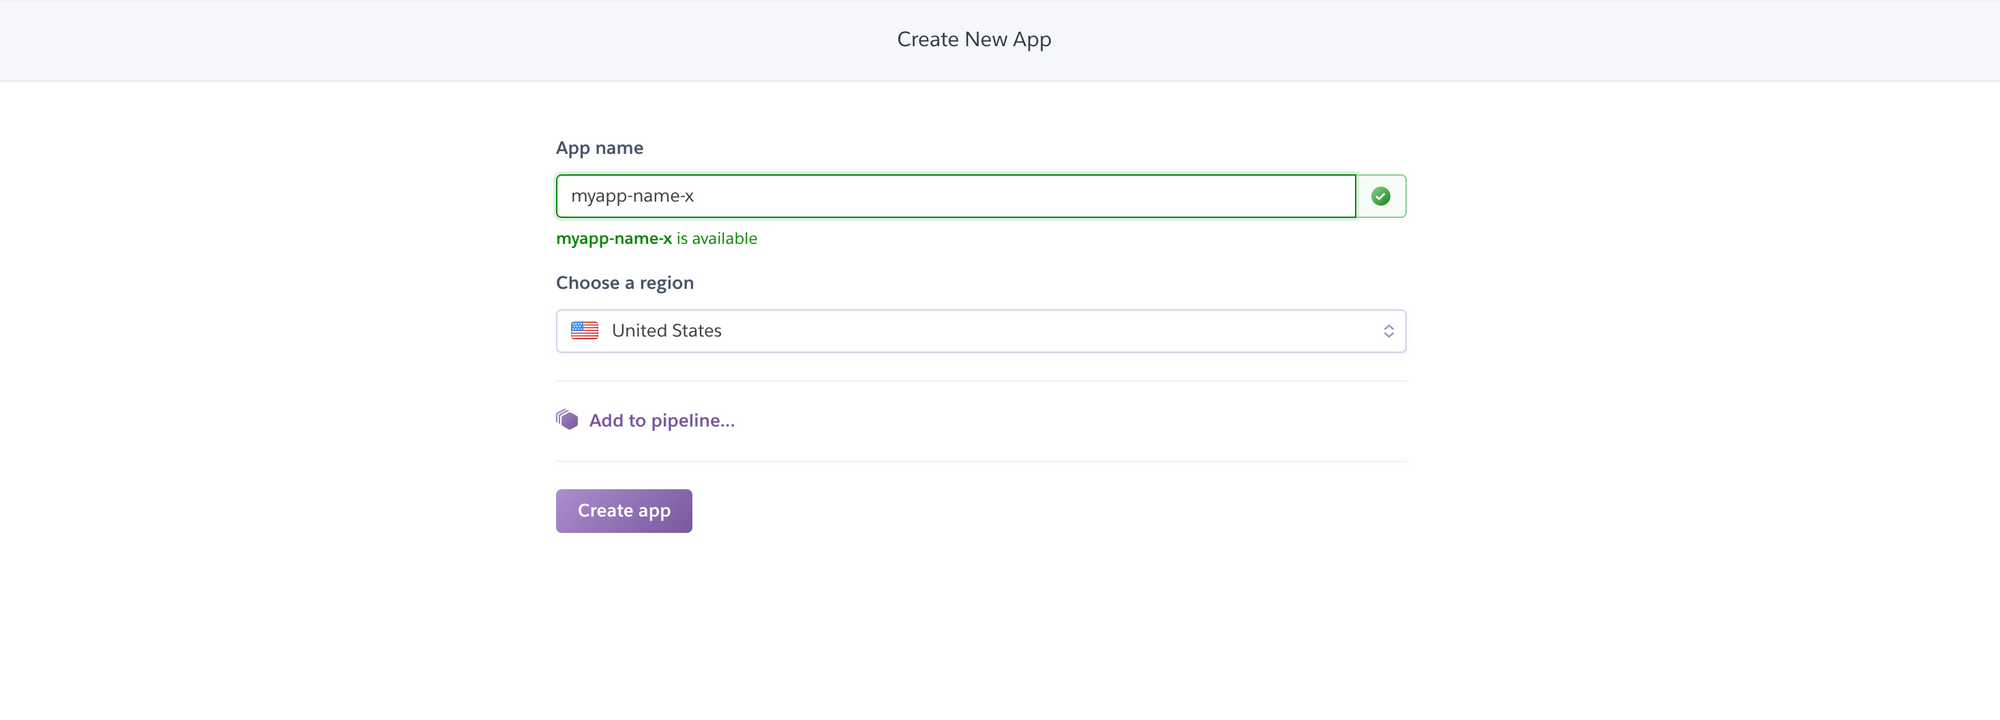
- Now that your account has been created, go ahead and create a new Heroku project/app.

- You will be presented with the next screen to input your project infos.
- Finally let's install the Heroku cli :
// On MacOS
$ brew tap heroku/brew && brew install heroku

// On Ubuntu/Linux
$ sudo snap install --classic herokuIf you are on Windows or any other platforms, you can download and install the binary from this link 👉 : https://devcenter.heroku.com/articles/heroku-cli.
$ heroku --version
II. The Mock Service.
Let's go ahead, setup and implement our Go mock service.
- Create project
$ go mod init github.com/your-username/mockservice-x- Next step, Installing dependencies, open the terminal in the project directory and run the 2 commands below, they will install all we need.
$ go get -u github.com/gin-gonic/gin

$ go get github.com/brianvoe/gofakeit/v5
- Create a main.go file and put in the code in the snipped below 👇
package main

import (
	"github.com/gin-gonic/gin"
	"time"
)

func main() {
	r := gin.Default()

	r.GET("/", func(c *gin.Context) {
		c.JSON(200, gin.H{
			"info": time.Now(),
		})
	})
	_ = r.Run()
}
Run the project, entry point is inside main.go, and open http://localhost:8080, should return current date & time in ISO 8601. If you got that right then the setup was done successfully.
- Implementing the mock data generation function. Here we will be using the fakeit library to generate some random mock data for our API.
// Generta a list of random mock data
func generateData() []gin.H {
	var dataList []gin.H
	for i := 0; i < 5; i++ {
		data := gin.H{
			"name":    gofakeit.Name(),
			"title":   gofakeit.JobTitle(),
			"country": gofakeit.Country(),
			"car":     fmt.Sprintf("%s - %s", gofakeit.CarMaker(), gofakeit.CarModel()),
			"address": gofakeit.Address().Address,
		}
		dataList = append(dataList, data)
	}
	return dataList
}- After implementing the mock data function, the main.go file will look 👇
package main

import (
	"fmt"
	"github.com/brianvoe/gofakeit/v5"
	"github.com/gin-gonic/gin"
	"time"
)

func main() {
	r := gin.Default()

	data := generateData()

	r.GET("/", func(c *gin.Context) {
		c.JSON(200, gin.H{
			"data": data,
			"time": time.Now().String(),
		})
	})
	_ = r.Run()
}

func generateData() []gin.H {
	var dataList []gin.H
	for i := 0; i < 5; i++ {
		data := gin.H{
			"name":    gofakeit.Name(),
			"title":   gofakeit.JobTitle(),
			"country": gofakeit.Country(),
			"car":     fmt.Sprintf("%s - %s", gofakeit.CarMaker(), gofakeit.CarModel()),
			"address": gofakeit.Address().Address,
		}
		dataList = append(dataList, data)
	}
	return dataList
}
III. Dockerize The Service
III. 1. Dockerfile & Heroku Config
A Dockerfile is a text file that holds necessary commands for assembling a docker image, which is a blueprint or a template that contains all necessary information and instructions to run an instance of our app on a Docker compatible platform.
- Create a file named
Dockerfilein the project directory and put in the instructions below 👇
// Start by selecting the base image for our service
FROM golang:1.13.14-alpine3.11

// Creating the `app` directory in which the app will run
RUN mkdir /app

// Move everything from root to the newly created app directory
ADD . /app

// Specifying app as our work directory in which
// futher instructions should run into
WORKDIR /app

// Download all neededed project dependencies
RUN go mod download

// Build the project executable binary
RUN go build -o main .

// Run/Starts the app executable binary
CMD ["/app/main"]Dockerfile - Add the
heroku.yamlconfig file in the project directory.
build:
  docker:
web: DockerfileThe project directory should look something like the tree below 👇
.
├── Dockerfile
├── go.mod
├── go.sum
├── heroku.yml
└── main.go
III. 2. Deploy the service.
- First step here is to track our project with version control, preferably Git in our case.
$ git init

$ git add .

$ git commit -m "Initial commit"
- Now, let's login in heroku, type the command below, and we will be asked to type any key do continue and it should open the browser to log in.
$ heroku login
- Next, open https://dashboard.heroku.com/apps and select the project that we initially created in the first part of this article, and then click on the Deploy tab.
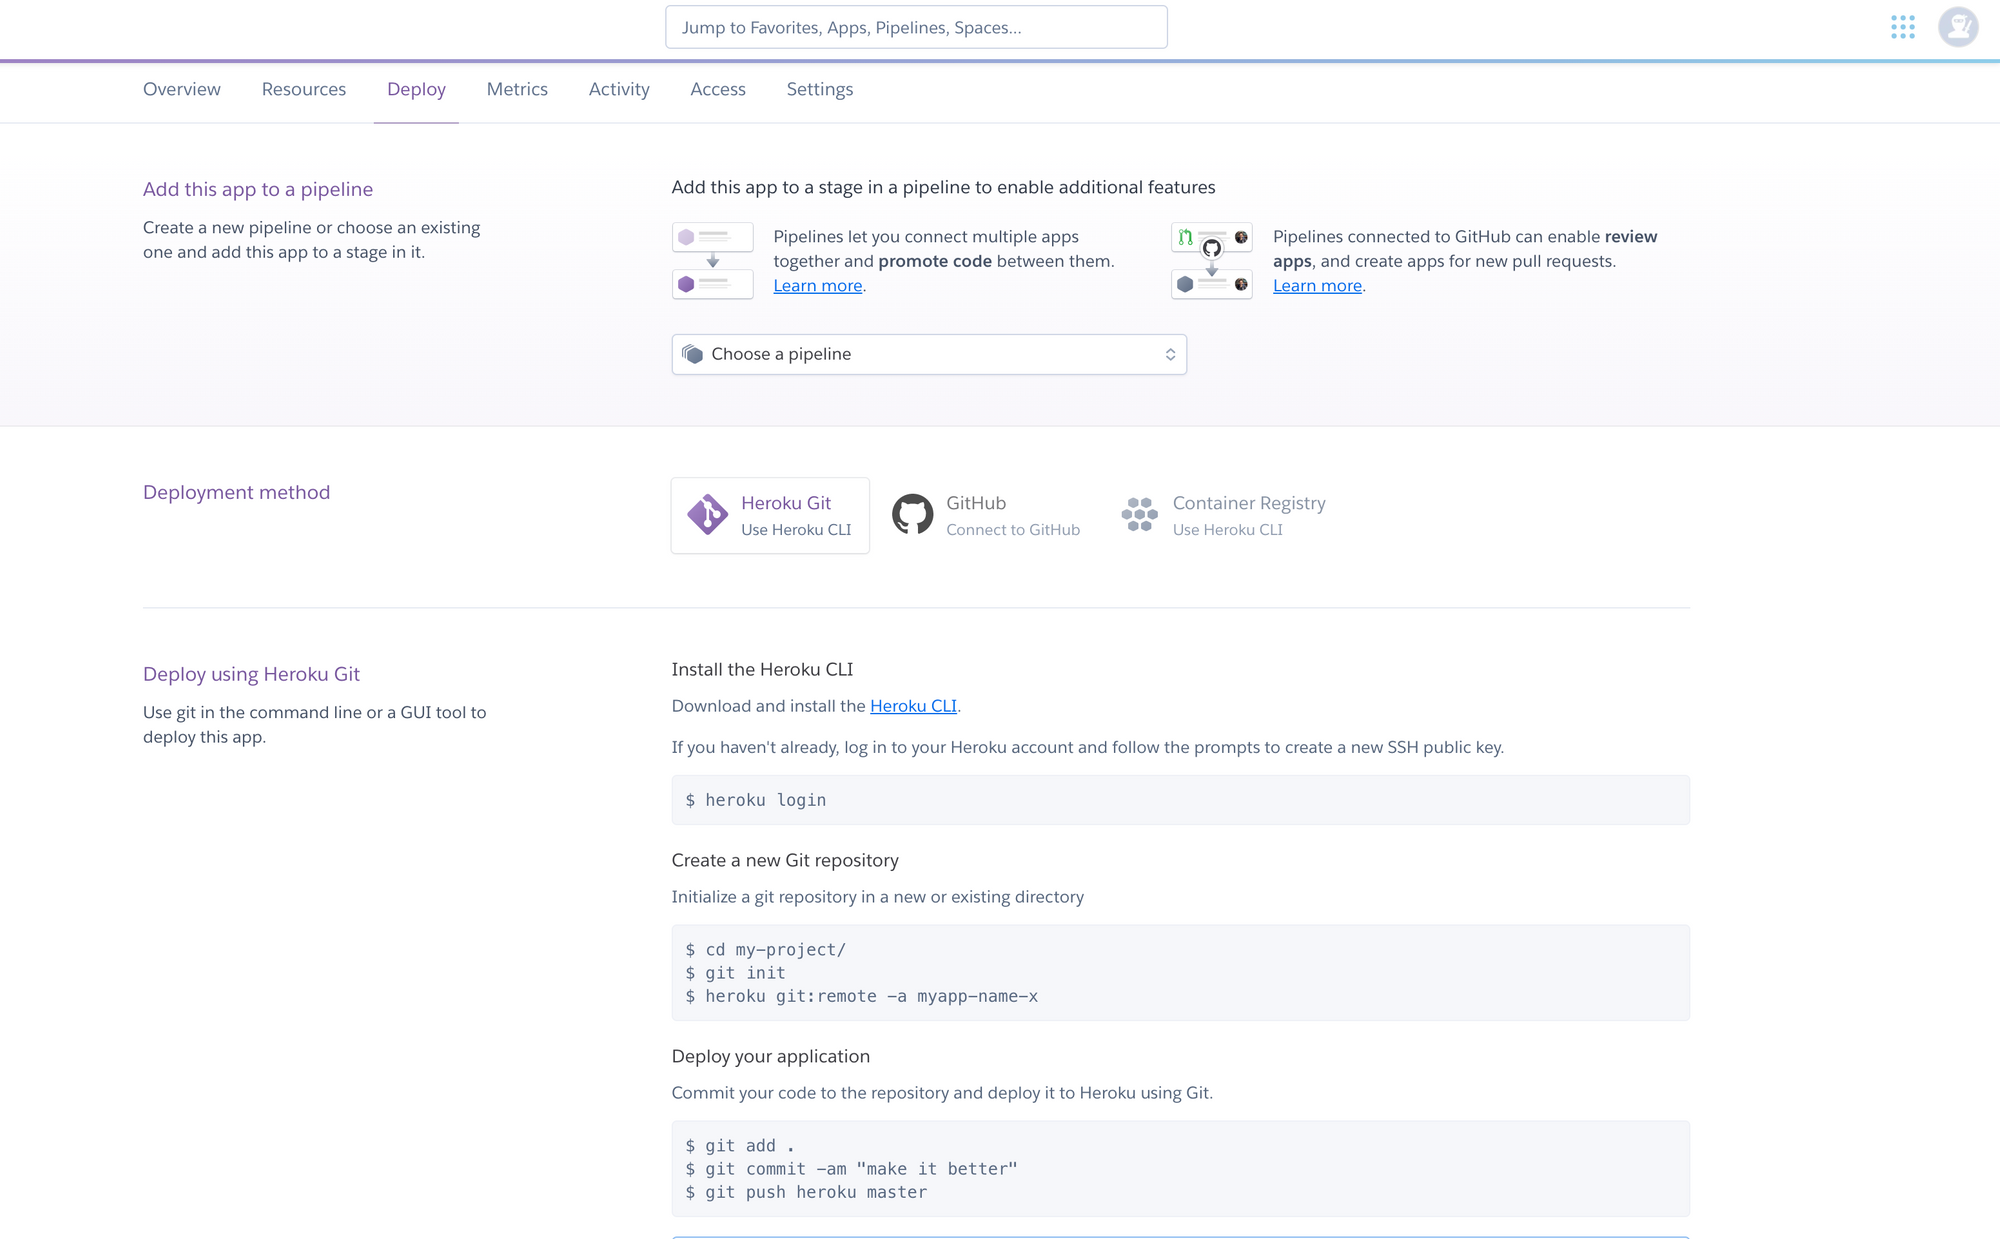
- Set git remote heroku and link our local project to the one we created on Heroku.
$ heroku git:remote -a myapp-name-x- Last step is deploying the project to Heroku, and it's basically just a single line.
$ git push heroku masterAfter deployment logs, it should output "Verifying deploy... done", which should mean our service was deployed successfully and it then displays a URL on which it got deployed to, in my case it's https://myapp-name-x.herokuapp.com/, this URL should be different depending on how you named your project.
Opening the link and we should have an output like this 👇, obviously the data will be different but the structure should be similar.
{
  "data": [
    {
      "address": "604 Garden chester, East Gerlach, Idaho 76568",
      "car": "Dacia - Avalon",
      "country": "Netherlands Antilles",
      "name": "Bart Beatty",
      "title": "Strategist"
    },
    {
      "address": "967 Mall shire, Arianebury, Vermont 37849",
      "car": "Toyota - Rav4 2wd",
      "country": "Equatorial Guinea",
      "name": "Mathias Hauck",
      "title": "Manager"
    },
    {
      "address": "105 Ridge side, North Grady, North Dakota 36287",
      "car": "Opel - 300c/srt-8",
      "country": "Holy See (Vatican City State)",
      "name": "Millie Purdy",
      "title": "Administrator"
    },
    {
      "address": "3312 Parkway side, Minniefort, Arkansas 35851",
      "car": "Hummer - S-type R",
      "country": "Kenya",
      "name": "Gabriella Walker",
      "title": "Supervisor"
    },
    {
      "address": "2477 Mill stad, Wallacestad, New York 60369",
      "car": "Cadillac - Envoy Xl 4wd",
      "country": "Isle of Man",
      "name": "Filiberto Pollich",
      "title": "Director"
    }
  ],
  "time": "2020-07-22 18:40:07.943689159 +0000 UTC m=+353.026298456"
}IV. Conclusion
🎉 Congrats ! We have just dockerized and deployed our service to Heroku.
I hope you learned something throughout this tutorial, If there's any question, feedback or suggestion, please contact me via Twitter or E Mail
V. Resources.
- Finalized project can be found here 👉 : https://github.com/eddywm/dockerize-go-service.
- https://docs.docker.com/
Ciao 👋